
Setting a Username for your Facebook Page
Setting up your business page on Facebook is only part of your task when it comes to managing your presence on the site; once you manage to get over the 25 “likes” hurdle you can give your Facebook page a more friendly address by setting your page username.
But what does this really mean, and why should you set your page’s username? Well, this is what your page’s web address will look like before setting it’s username:
www.facebook.com/pages/OBrien-Media-Design-Swindon/224325524284087
And when you’ve given it a nice friendly username it’ll look something like this:
www.facebook.com/obrienmediauk
Much better!
Now it’ll not only be easier to tell people your Facebook page address, but it’ll fit on business cards, on your twitter bio and all sorts of other places.
So, first things first – you need to be logged into Facebook using the account you use to manage your Facebook page, and then go to:
And follow the simple steps below to set your Facebook page username:
-
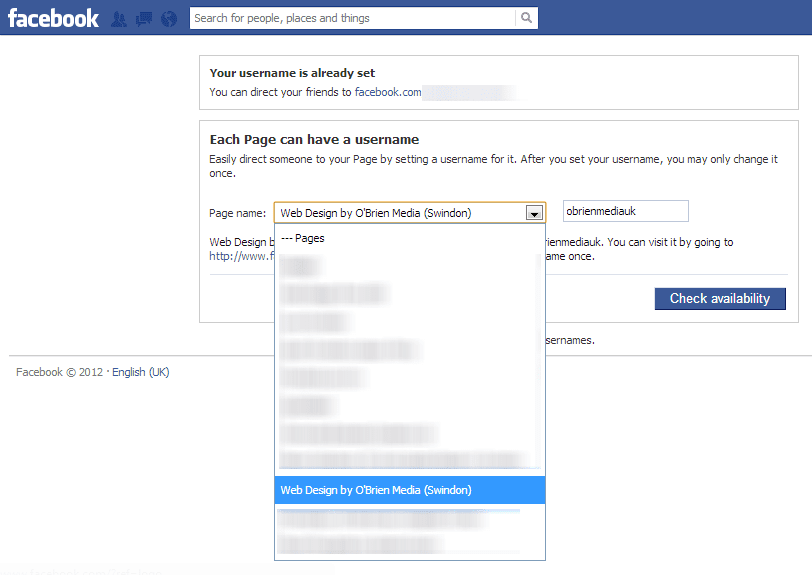
Click on the Page Name dropdown box and select the page you are now administrator of
- Type in a username for that page (be very careful as you cannot undo this)
If you don’t have 25 or more “likes” you can’t set a username and will be shown an error message at this point -
Check the availability of the username and confirm the change
-
You have just added a username to your page and can access it using its new address immediately