This guide will go through the steps required to set up the Android Email app included with most Android phones and tablets, such as those from Samsung, Sony, Motorola, Google and OnePlus.
Before you start, make sure you have all of your account details to hand.
1. Getting started
First, find your ‘Email‘ app. If you’re not sure where to find an app, the best place to look is in the Apps menu.
To access the Apps menu, simply swipe from the bottom of the screen to the top. You’ll be presented with a list of every app that’s on your device.
2. Accessing Your Settings
Once you’re in ‘Email‘, find and tap the cog in the upper left (see below).

3. Accessing your Account
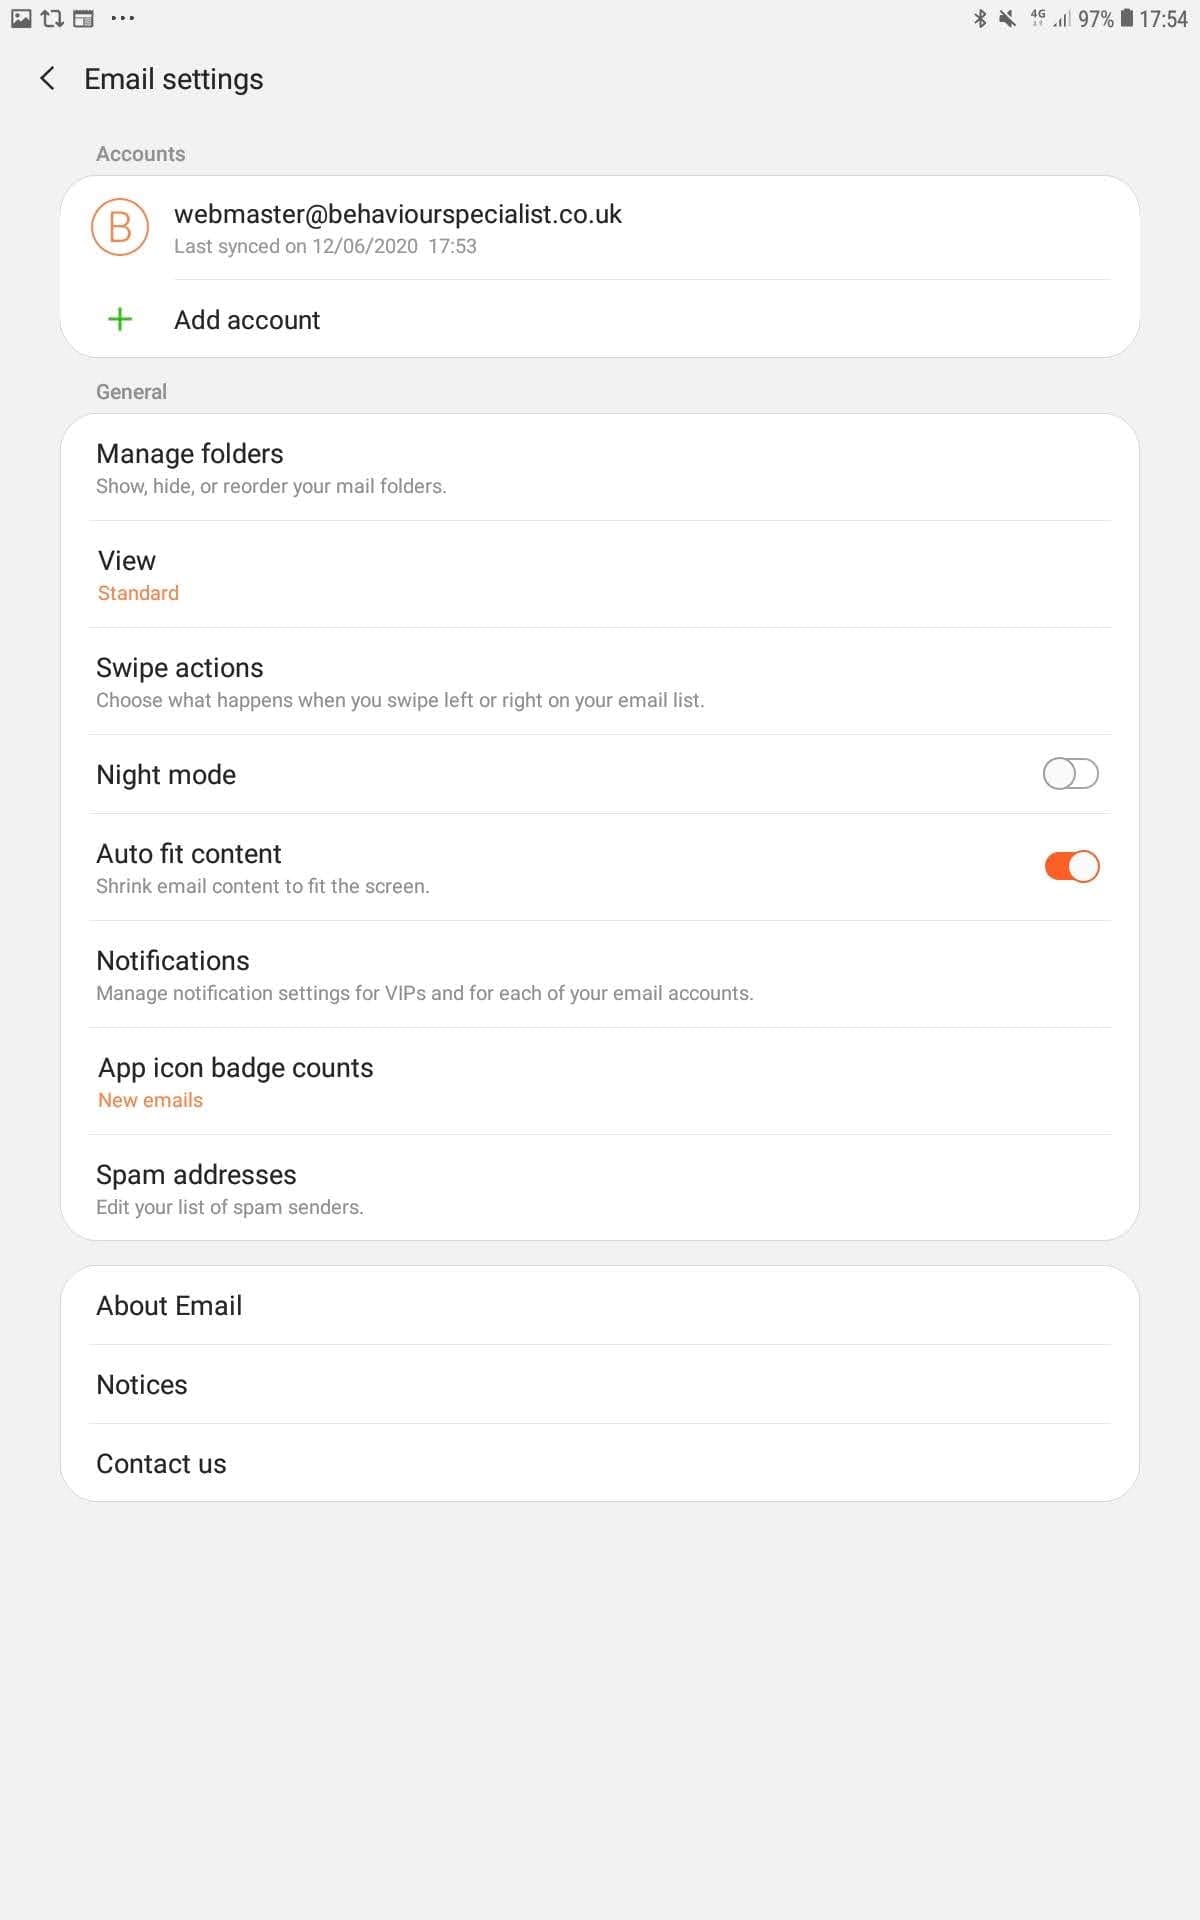
You should now be in Email Settings (see below for an example). Tap on the account you want to change.

4. Accessing Server Settings
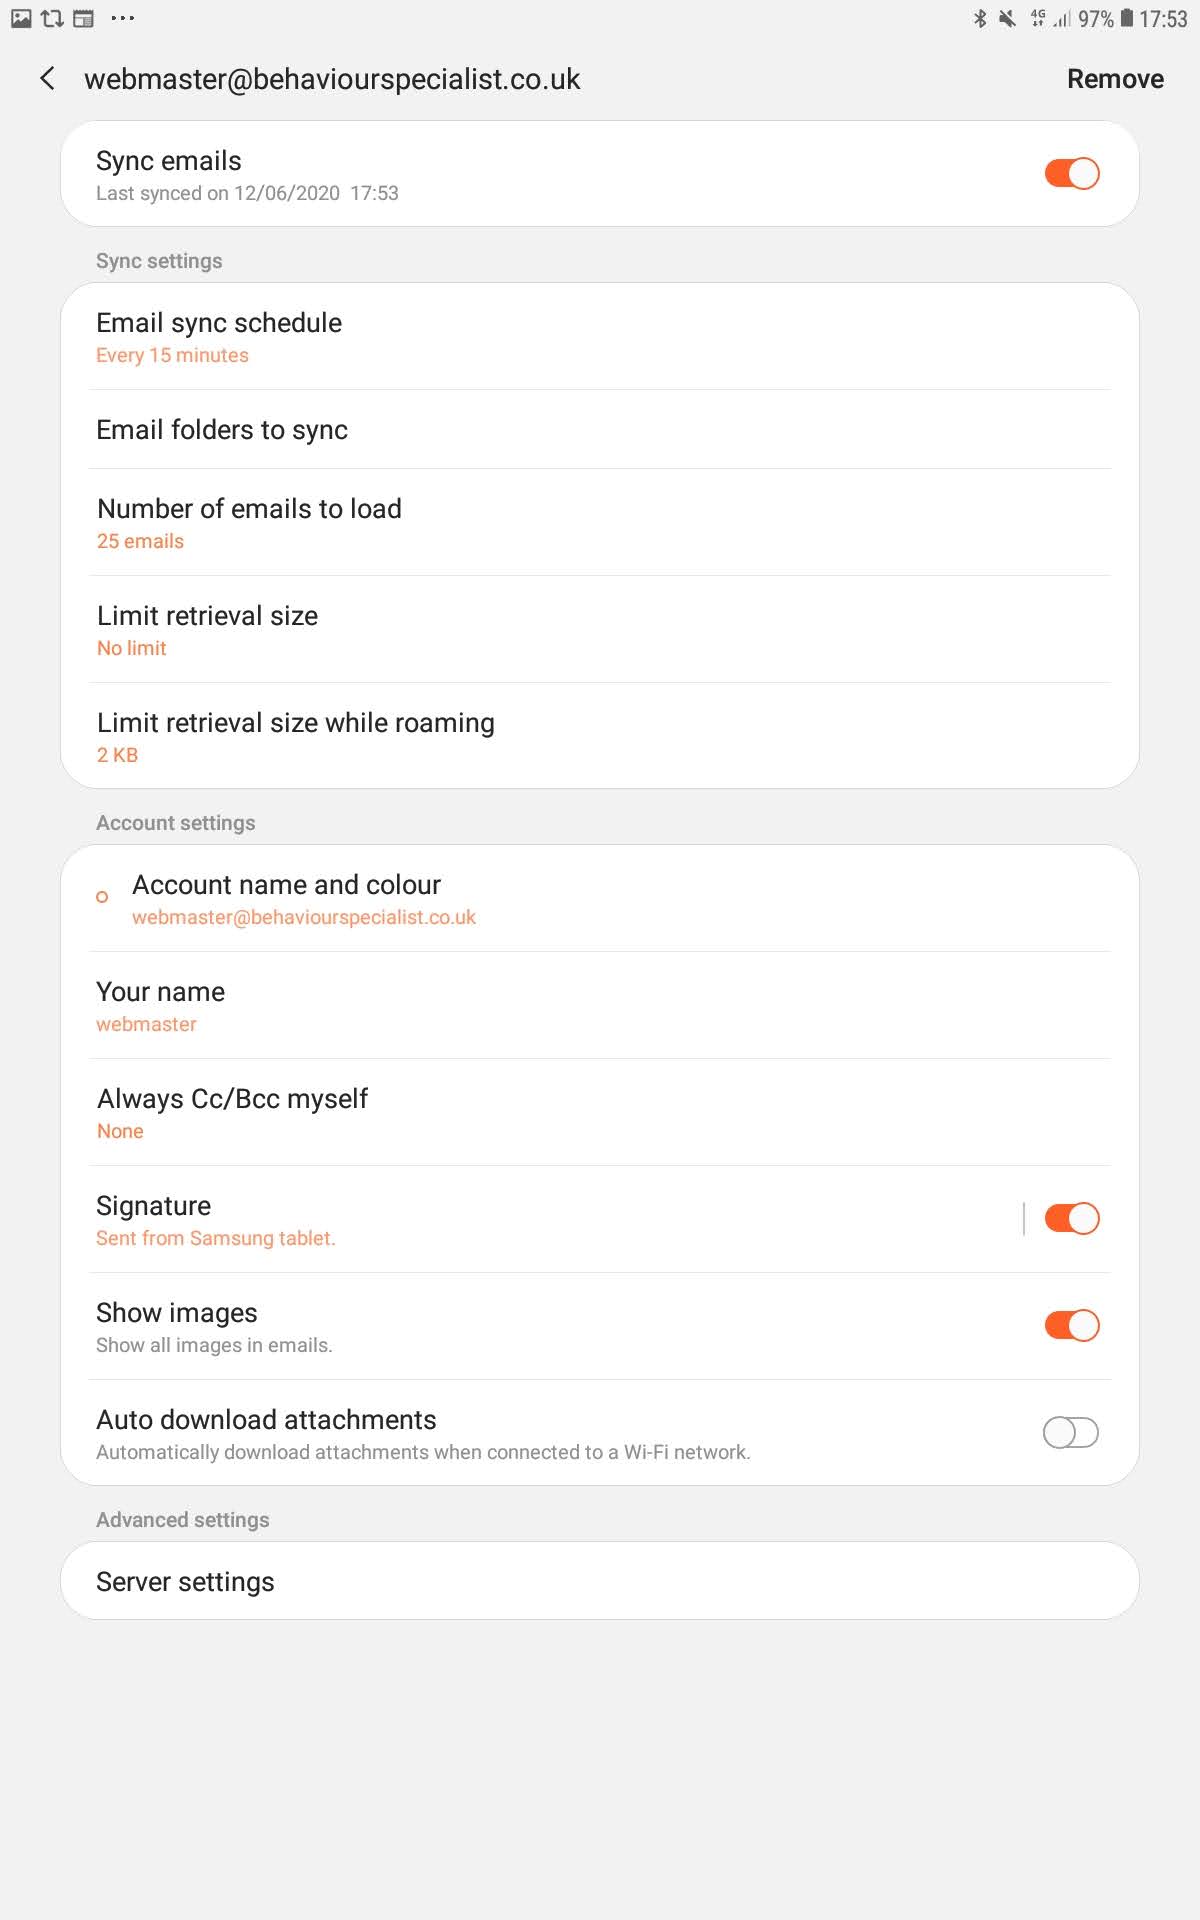
At the bottom of the account page under Advanced Settings there is an entry marked Server Settings (see below). Tap that to find the section where you enter your account information.

5. Updating Your Server Settings
This is the fiddly bit.
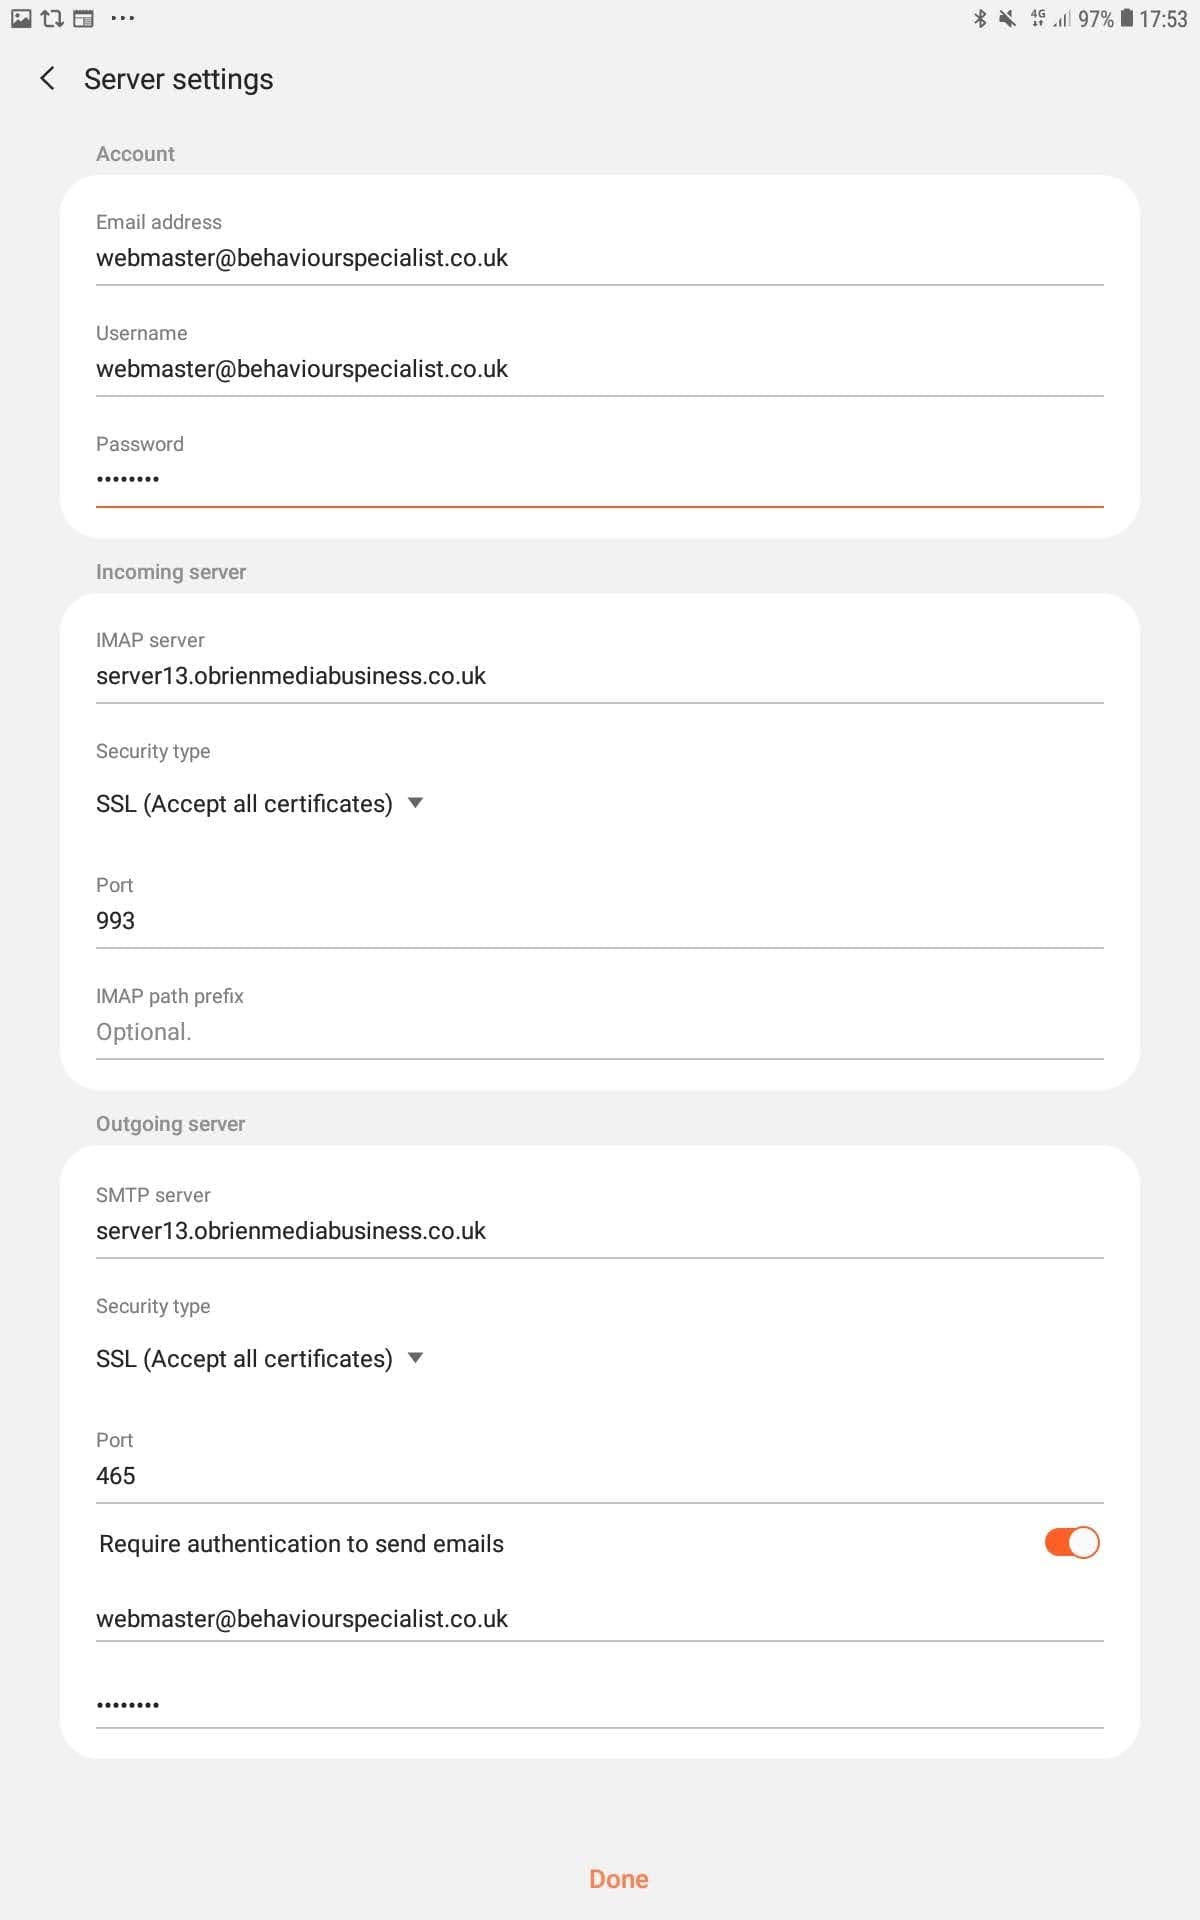
- Enter the email address and username you were given. They should be exactly the same.
- Then jam your provided password in the next field.
Incoming Server:
- In the IMAP Server field, carefully enter the exact address you were given. It will probably be ‘server<number>.obrienmediabusiness.co.uk’.
- For Security Type, select SSL (Accept all certificates).
- Under Port, type 993
Outgoing Server:
- In the SMTP Server field, add the corresponding server address. It’s probably the same as the one you used for the incoming server.
- For Security Type, select SSL (Accept all certificates).
- Under Port, type 465
Below is an example of the completed form. At the bottom there is a Done button. Once all your details are in, go ahead and click it.

